Thursday, February 25, 2010

Starting over

Okay, enough of this. I'm packing my shit and moving to WordPress. Why? because I need to learn as much of the ins and outs of that system as my aged brain possibly can for my day job, and what better way to learn it than to use it? Don't expect much off the bat though. It's still pretty early in the process, and currently I'm importing as much as I can from my old Blogger sites.

So, if you managed to hang on this long, things are finally going to change for the better (he says with a politician's smile)!

This is... what... the third time I've left this place? the first was to go to Vox, but I never really liked it there. The second was to try my own blogging deal at fizzleandpop.com but the software I was using made updating a chore. I'm pretty sure that makes this the third, which should make it the charm.

I'm hosting the new Visual Breakdown site at fizzleandpop.com/visualbreakdown.

I hope to see you there.

Collin

Wednesday, May 23, 2007

Zombie "Fan-Art" ...

... for D.L. Snell's latest book "Roses of Blood on Barbwire Vines"

First some sketches to try to flesh out the author's mental image of his zombies:


The second and third were the closest, although the tentacles needed to be narrower. With those in mind I made a thin line drawing that I would later add vector layers and more line work to:


Now the vector layers are done:


I'll update later with the final piece when it's done.

It's done. Here's the Black & White version:


and the color version:


Saturday, May 12, 2007

Photoshop Pen Tool

Labels:

Thursday, April 19, 2007

Another old one.

Very basic instructions and very little explanation, but still similar to how I do a lot of my illustrations in Photoshop even now.

IF: "Superhero" Breakdown

I know it's been ages since I posted at this site. I also know that some of the earlier breakdowns that I posted are now missing their art files. That was due to my attempt to make my flickr site searchable again. They had flagged me as NIPSA (Not in public search area). Anyhow, any future breakdowns images that I will post will be hosted at SmugMug because they aren't elitist photography snobs. Or they will be videos, like today's offering.

This is a bit old, but I also took forever getting the videos processed and uploaded. The good news for the future is I now have a director account at YouTube, so I shouldn't be limited to 10 minutes anymore. I'll test that in a week or so.

So, without further rambling, I give you the visual breakdown of the drawing that I did for the Illustration Friday topic "Superhero".

Initial sketch:


Part 1:


Part 2:


Part 3:

Wednesday, April 18, 2007

An oldie.

"Tea" illustration for Illustration Friday done in February, 2006.

Program: Photoshop
Time to complete: No idea. It was over a year ago. Maybe 2.5 hours.

First I started with a test drawing of the Hatter's head, getting an idea of how I wanted it to look:


Then I did a sketch and started adding in vector layers:


Almost all of the vector layers are in, shown with the bulk of them at 30% opacity:


All of the layers are now in and they have their own color and I've started laying in lines on new layers, grouping the lines to the layer that they are above. I'll show why that's handy in a future video:


And here's the final illustration:


Here's the same image with all of the shapes turned off:


...and with all of the lines turned off; shapes turned on:

Wednesday, July 12, 2006

Breakdown of "Skyline"

All images are clickable to view at a larger size in a new window.

Programs: Photoshop CS2, ArtRage 2
Tablet: Wacom 'Intuos 2' 12" x 9"
Time: No accurate idea, but it felt like 3 hours spread over three days.
Layers: 12 before final Photoshop work : 16 for the final image.

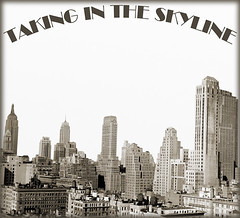
I know that I'm not that great at drawing scenery, particularly buildings, so for this Illustration Friday topic – "Skyline" – I decided to modify a pre-existing photo of a skyline. We have a wide variety of Photodiscs where I work, so I figured I had a good chance of finding a suitable photo there. And I did:


I opened the photo in Photoshop and, since it was originally black & white, I converted it to RGB and adjusted the hue/saturation to give it a bit of a brownish color. Not quite sepia tone. I also clipped the buildings from the original background and added the header that I planned on using at this point – font: Broadway BT – and a dark edged, fuzzy border for depth. Each of these elements – border, text, buildings and white background – were on their own layers and I saved the file as a PSD.

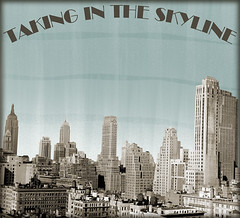
I then imported the PSD into ArtRage 2 and created a couple of layers behind the buildings to use for the background:


I created the background with the paint roller tool, by alternating horizontal blue strokes on the bottom layer, and vertical strokes of white starting at the bottom edge of the next layer up with the brush's "Thinners" setting at 94% and "Loading" set to 6% so that it would fade out halfway up the image.

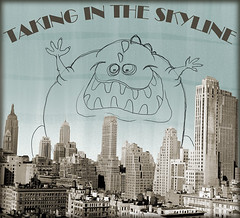
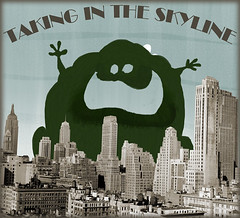
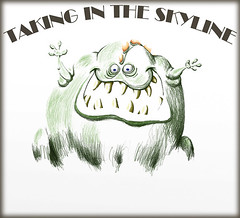
Next I created another layer between the sky and the buildings and sketched out my monster with the pencil tool:


I dropped the opacity of that layer to approximately 30% and created yet another layer beneath it that I used for my first stage of coloring. That way I would be using the sketch layer as a template and it wouldn't interfere with my new lines as much as it tends to when I leave it black.

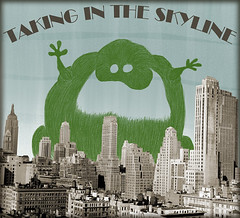
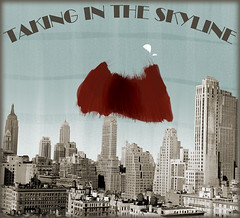
Sticking with the pencil tool I created the main layer of color that I would base everything else off of:


I turned off the sketch layer for the screenshot so the new lines wouldn't be obscured by the old lines. I noticed that I could still see the sky through the space between the lines, and I knew I wanted to darken it up a bit, so:


I added another layer below the first color layer and drew in a dark base using the marker tool and a slightly darker ink based off of the first color. I made the lip by placing even darker marker lines along the bottom of the lip. Tthen I used the paintbrush as a dry brush tool by setting the "thinner" to max and the "loading" to 0% and then pulling the darkest green across the lighter green.

I also added the white back spikes on the topmost sky layer in pencil because I wanted them to fall easily behind the bulk of the monster, but I didn't feel like making yet another layer just for that.

Then I moved on to the mouth:


I made it by adding yet another layer beneath the last layer and using the same marker and dry brushing technique that I used with the lip. Notice the floating white back spikes?

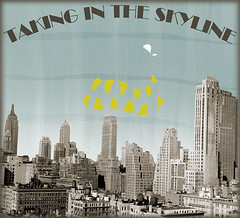
From there the next step was to make another layer and add in the teeth, once again using the pencil tool:


Now, there's no real need to work with so many layers; it's just something that I'm used to doing from many years of working with Photoshop. The main advantage is, if you mess something up you only mess up on that one layer. It also gives you a way to try out several different things without locking you into the first one you try. And finally, it works wonderfully for overlapping things that you may want to shift around later. As of now there's no way to shift things around in ArtRage 2, but that's why I work in a PSD format so that I can do it if I want to by taking it into Photoshop.

And speaking of layers, here's how it looks at this point with all of the main layers turned back on, and the sketch layer left off:


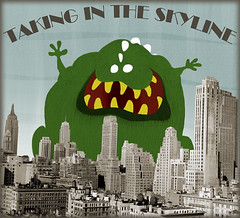
That just left the fine tuning provided by detailing with the pencil tool. Here is that layer, isolated from the rest:


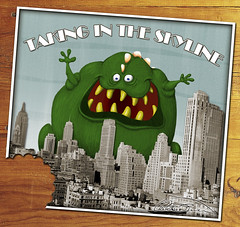
Once that was done I saved the PSD, quit out of ArtRage 2 and opened the PSD in Photoshop. There I expanded my canvas size, added a white border to make it look more like a postcard, added a wood background, took a bite out of the image using layer masks and gave it a slight rotation:


And there you have it. I feel like it took longer to write all of this out then it did to make the original. I need to come up with a better way of doing this.

Until next time, have fun. Also, if you haven't checked ArtRage 2 out, give it a look. It's a pretty decent natural media art program at a really good price and it's only going to get better.

Wednesday, July 05, 2006

Illustration Friday - "Sticky"

For my first post I'm simply going to "reprint" my latest post at Fizzle & Pop.

-----

Once again I decided to try my hand at ArtRage 2 and see what I could come up with. I have also included some of the stages that it passed through. Click the pics to see bigger versions of each.


Once again I stuck with the pencil tool for the most part. The only exception is the background that I made with the roller. I tried to work with the oils first, but – much like real life – paint just isn't my friend. I'll try working at it as a side project and see if I can make something decent out of it however for something on a deadline like IF I think it would be wise to stick with what I'm "good" at. One thing I can't remember about oils though: do you work from light to dark, or dark to light? Anyhow. On with the steps.


Here's the initial sketch, again done entirely in ArtRage 2. I made it on its own layer and built the final image on layers beneath it. Text on both this and the final were added in Photoshop.


I started by focusing on coloring the boy. This is what led me to discover – and report – a bug within AR2. After completing the initial sketch I exported the image as a Photoshop file (PSD) so that I could track the steps that I went through.

After I reached this point of coloring I shut down AR2, then came back to it a bit later. When I opened my original file none of the color work that I had done was there. I opened the PSD in Photoshop and the color work WAS there. IT was most strange, but it seems that after I exported the file the program decided that the PSD was the main file I was working on. So, every time I saved, it updated the PSD instead of the file I was expecting it to. Thinking I had essentially lost the time that I had spent on it, I decided I to delete the color layer from the PSD, since I can't get the same level of "pencil" look with Photoshop, and finish the drawing in my old standard cut paper style. However I still wanted to do a paint roller background, so I saved the PSD – after having tossed the color layer – and imported it into AR2. I thought it would come in flat and I would then make the background, save it as something else, open it in PS and copy the background over.

Surprise!

It kept its layers when imported. Oh, sure, it probably wouldn't have surprised someone who read the manual, but that guy isn't me. It was then that I realized if I hadn't tossed out the color layer I could have continued to work on it after all. Oops.

Because I didn't really want to do this drawing as cut paper, and because I now understood what had happened and wouldn't be messed up by it again, I resumed work in ArtRage 2.


Stage 2


Working a little differently this time, I decided to block in all of the colors first thing. I had wanted to show a stage with JUST the colors blocked in, but I got into the "zone" and basically forgot until after I had already begun to detail the boy. I'm just really not that great at capturing the steps I go through when making something. Add that to the long list of crap I need to work on.


Stage 3


At this point I've detailed a few more objects and I've also decided to stop tracking the stages because it really can't be that interesting. "Now here, you see, I've added a bit of line and shadow to create the kite string. Next I've touched up the shadows a bit around the kid's feet." Bah. Now if I could find a way to do a video of the work, that would be awesome.

Anyhow, it was fun, it's done and I hope you, my mostly invisible audience, enjoy it. Feel free to comment.